Friday, June 20, 2014
Lovely Federal Kitchen
I recently had the privilege of designing and project managing a lovely kitchen remodeling project for some very dear friends. They had patiently waited for many years to redo their kitchen and the time was finally right. I have the joy of working with a very talented group of people without whom this project would not be possible.
I am afraid the photos do not do this project justice as it is gorgeous in person. The cabinets are all painted a dark charcoal gray and the island and accents behind the glass doors are a very dark red. The upper and lower cabinets are painted the same color although the lower cabinets appear lighter in the photos.
Our sample door and pretty cabinet foot for the plate rack hutch.
The colors are a bit more accurate in this photo. You can see the wine cooler and microwave drawer in the island from this angle near the garage door.
Notice the outlet on the trash pullout end of the island near the sink. So handy!
Take a look at the range hood detail here and the beautiful tile work.
The homeowners specifically asked for our cabinetmaker to build this utensil storage drawer next to the range.
This is the view from the back door. The glass cabinet with three sides of glass was quite the problem-solver for an awkward corner.
Notice the craftsmanship on the fluted corners and furniture base detail on the sink peninsula.
We even built in a bit of shallow storage under the bar stools.
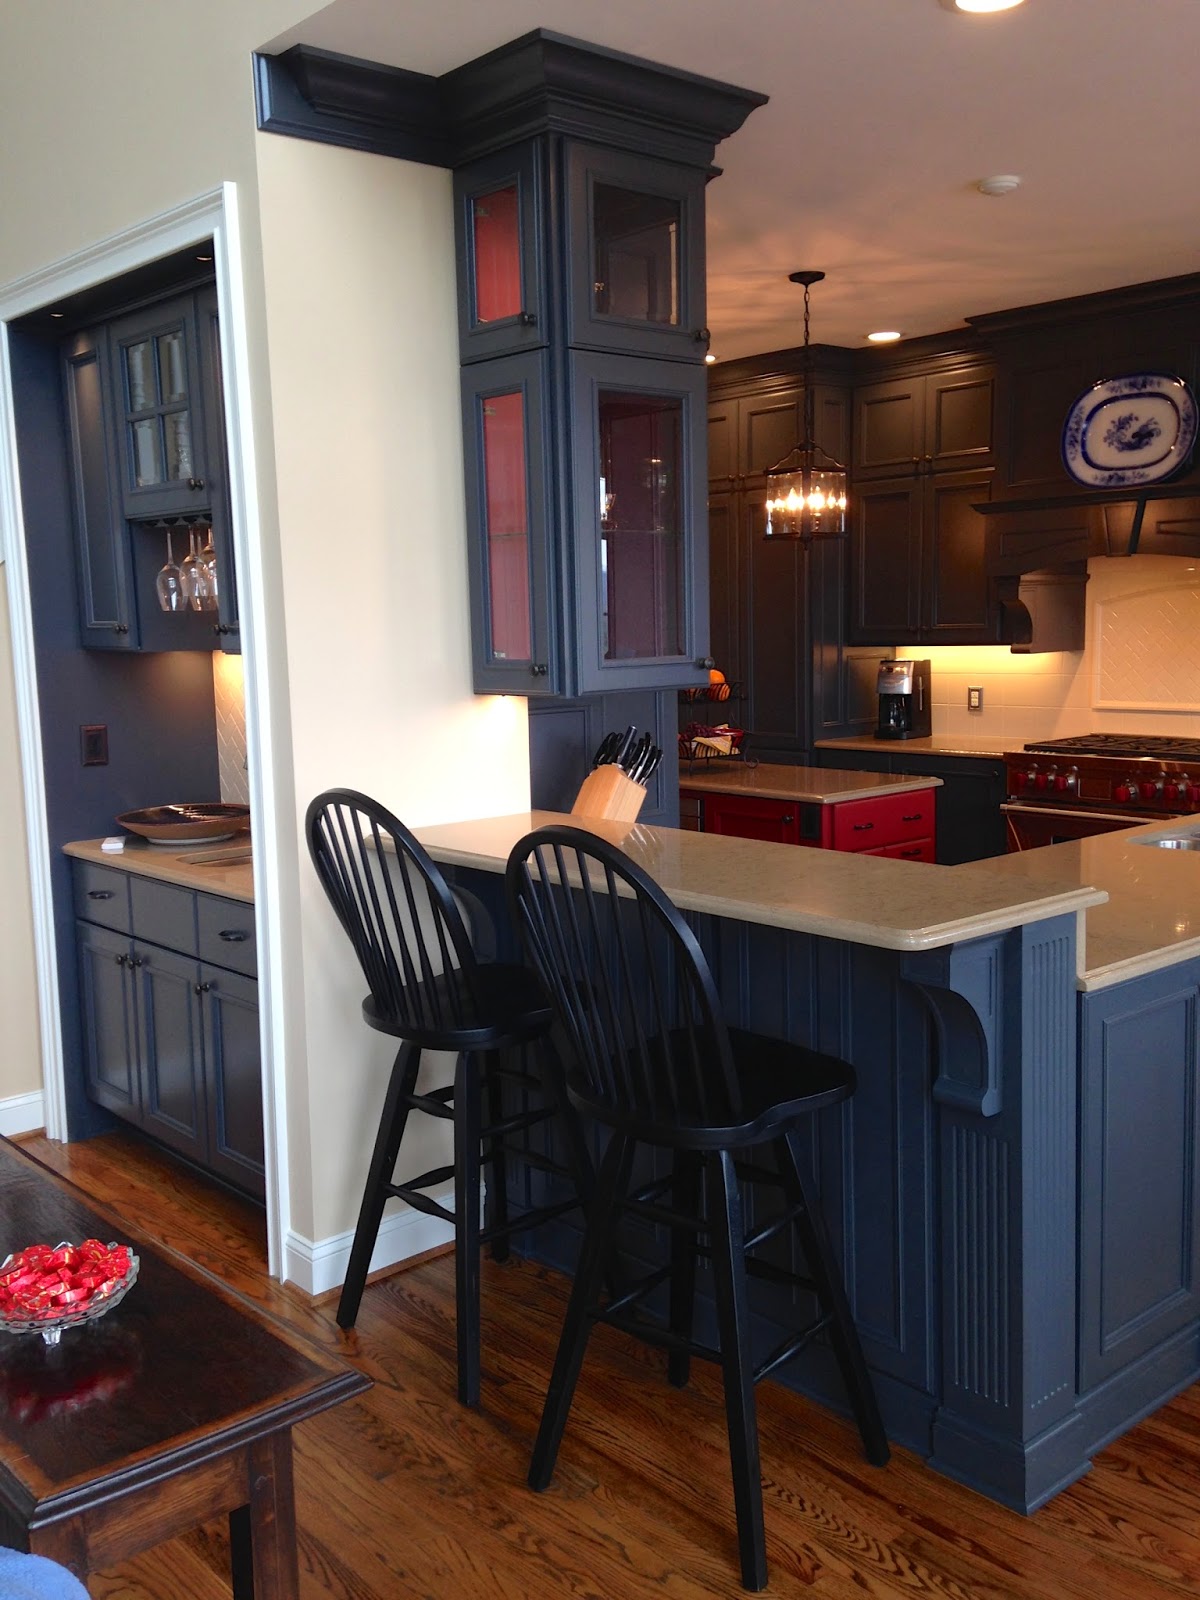
Bar area and seating
Intricate herringbone tile backsplash in the bar area is a nice touch.
Long view to the back door
Across the family room from the kitchen, we painted the bookcases and this was a photo during that process. I will add a finished photo soon.
Before
Before
Before
I will be in trouble for this photo of my contractor, but I am ok with that.
Our cabinetmaker color matching the paint samples. (I asked for it to be a bit darker.)
Our crack cabinet-making team on one of the many installation days.
Forget the schedules you imagine on HGTV. Building kitchens is a lot of hard, time-consuming work.
I can't thank my amazing team enough for all their hard work and dedication to excellence. They are consummate professionals who never fail to deliver and don't let egos get in the way of a beautiful job and a pleased homeowner. They make my job almost easy. My apologies if I have left out a name.
Donna Snover
L. B. Greene and Sons
George Lamons and his cabinetmakers
Terry Hartly
Maria Curd
Shelton Tile
Alda Smith
Mountain Empire Stoneworks
Cindy Aiton
What a lovely space to call home!
Labels:
Kitchens
Tuesday, July 23, 2013
Turquoise Pantry
I had a problem. My pantry was bad news. Bad news. It was dirty, unusable, had no shelving, and was just plain ugly. It had been painted gold circa 1973 with oil-based paint, and had never been changed. So, I had a wild hair one day and decided to paint it my favorite color.....turquoise. I wanted to build shelves. I wanted to claim the space. I didn't want to work on it for three weeks, but full of the zeal of a new project, I didn't estimate how much work it was REALLY going to take to make it usuable and beautiful. I brought the paint chips above and the primer home and rolled up my sleeves.
I opened the door. Ewwwww. This is what I saw. This really was going to take longer than I thought.
Before
I cleaned it out and began to prime. I should make a note here for do-it-yourselfers that I sanded the walls and door about three years ago, but the other projects I had going put the pantry on hold for a while. A while equal approximately three years.
Too bright! Even I was not that bold and had the paint toned down.
Too late to turn back now.
Wall painted twice and door primed.
Time to get serious with the building. I had constant supervision and perhaps a little judgement from Charlie the cat.
This was about 2 weeks later and I began to see the light at the end of the tunnel.
Finally! The stained shelf at the bottom is for my recycling bin. I built it high enough to slide my outdoor shoes underneath. Even added a hook for my grocery bags.
I am so pleased with the results! Build one for yourself. You can do it!
Labels:
Budget,
New old house
Guest bedroom Makeover
This beautiful, calm guest room would be a lovely place to stay for a weekend with friends or family. But this was not how it looked two weeks ago. It was tired, dingy, and ready for an infusion of lovely linens and an elegant paint color.
Before
We chose a beautiful blue gray paint color from Benjamin Moore called Beach Glass. It gave the room instant personality and a sense of peace and calmness. We reused the bedside lamp and added gorgeous butterfly lithographs that we found at Southern Treasures in Gray, TN. We chose linens from Pottery Barn and local sources. The duvet cover contains a down duvet that will be delicious in the chilly winter months.
Gold silk drapes are a graceful finishing touch.
A mercury glass lamp and striking art from Pier 1 finish this side of the guest room.
Who wouldn't enjoy a weekend away in this lovely room?
Labels:
Bedrooms
Wednesday, June 26, 2013
Solar Powered Porch Lamp
Thursday, June 13, 2013
The Power of Paint
Even I sometimes forget the amazing transformative power of paint, though I have seen it countless times. I was reminded this morning when I saw the before and after photos that blogger Miss Mustard Seed posted yesterday. She painted her plain Target barstools a beautiful, soft robin's egg blue, and they look amazing in her kitchen. The power of that color in the neutral room, even though it is not a bold color, is remarkable.
Marion is the master of painted finishes and you can see her work here. She prefers milk paint and a more heavily distressed finish than I, but she does beautiful finishes with depth and texture and explains the whole process so that a beginner can try with confidence. Miss Mustard Seed
Before
You may have seen the photos I posted of my dining room table and chairs last fall. The golden oak finish was tired and dated, so I removed the cushions, sanded them down, and painted them with a few cans of my trusty Black Satin Rustoleum. (Be sure to pay a little extra for the cans with the trigger. Your hands will thank you!)
After
I also refinished the table top and painted the legs (with a brush) of the table. What a delightful transformation! It seems like I have a brand new set.
I distressed the chairs very lightly with fine sandpaper and finished with a coat of brown paste wax.
Ahh, the power of paint.
Labels:
Budget,
Dining rooms,
Kitchens
Wednesday, June 12, 2013
What are we going to do with ALL these shiny brass doorknobs and hinges?
Yep. It's a dilema. You want to update your kitchen, bathroom, living room, etc., but those really dated (and usually tarnished) shiny brass builder's grade door knobs and hinges are all over the house. You can ignore them, replace them ($, ouch), or paint them. Young House Love has a great solution for you. Paint them in an oil-rubbed bronze spray paint!
Let me know if you do this successfully and how long they last without needing repainting, as I have never done this.
Click here to see what those crazy kids over at Young House Love did with their hardware. Don't forget to paint all your vent covers as well, and send photos!
Labels:
Budget
Monday, May 13, 2013
Making Over A Beloved Small Kitchen
Your kitchen doesn't have to be enormous to be beautiful. Just look at this jewel! I had the opportunity this year (well, honestly, we have been talking about it for a couple of years!) to consult on this pretty makeover for a friend's mother in Delaware. I wish I could be there to see it all finished and hope to add even more photos to this post as I receive them.
Before
Before
This homeowner has lived in her lovely home for many, many years and raised a large family in this beloved kitchen, but it was overdue for a facelift. She wanted to use the same footprint that she had as the layout was nice, but all the surfaces needed updating. Keeping a close watch on the budget, we decided to use the existing cabinets, but to replace the doors, and to paint the frames. What a pretty, cost-effective way to approach a remodeling project!
Right hand side of kitchen
(Note the pretty molding added to the side of the cabinets.)
We chose a bolder shade of the wall color for the backdoor, just for a little pop of color.
Adjacent eating area.
(Note the companion lighting to the kitchen sink pendant.)
Beautiful gray floor tile, black granite countertops, and white bevel edged subway tiles for backsplash.
What a beauty! Definitely worth the wait.
Subscribe to:
Posts (Atom)